Written on: September 29, 2025 by Timmie McElwain
This is the second in a series of articles on Honeywell S9301A Integrated Boiler Control, which provides operation of a high efficiency gas boiler with a combustion air blower and a combination hot surface igniter/flame sensor. We listed all the features of this control in the July/August 2025 issue of Indoor Comfort Marketing.
In this issue, we will discuss the sequence of operation. In Part 3, we will go over troubleshooting for this control.
Functional Description
The S9301A Integrated Boiler Control is fully certified by the American Gas Association (AGA) and the Compressed Gas Association (CGA) as an Automatic Gas Ignition Device. It is intended for residential boilers only, and not for use with a vent damper. Other applications require a review and written approval from Honeywell Residential Design Engineering; contact your Honeywell Sales Representative for assistance.
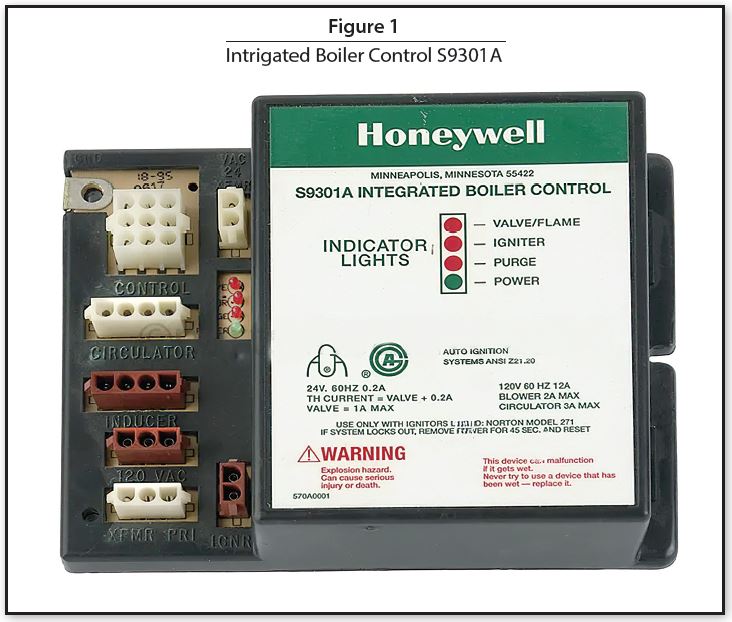
It provides:
For gas control, any 24 volts of alternating current (VAC) redundant direct ignition gas control rated at 1 A or less will suffice; Honeywell VR8205 is recommended. For the hot surface igniter, use a Norton Model 271 or equivalent. The igniter current draw must not exceed 5 A with 132 VAC applied.
The common ground required between the S9301A and the burner is supplied through the plug connected to the CN6 receptacle on the board; a good ground connection is essential for proper operation.
Make sure the transformer has adequate volt-ampere (VA). To determine the total VA requirement, add the maximum current draw in amps of all devices in the control circuit, including the boiler control and the gas control, and multiply times 24. The result is the minimum transformer VA rating. Use a class II transformer if replacement is required. This is a design by Tridelta and Honeywell.
Sequence of Operations
There is a relationship between the relays and each component. For example, on the Call for Heat relays, 1K and 2K are energized and the Circulator and Combustion Air Blower are turned on.
1. Power up/standby: Upon applying power, the control will reset, going through a two-second warm-up, and enter its thermostat scan state.
2. Initiate call for heat: Once a valid call for heat is received from the thermostat, the circulator will be turned on. If the aquastat and any auxiliary limits are also closed, indicating that boiler water is cool enough, the control will go through a reset and enter a 15-second pre-purge, during which the combustion blower runs.
The red purge LED will be on during this period. The air flow pressure switch contacts are checked prior to startup of the blower, and thereafter monitor the combustion flow.
3. Igniter warm-up: Next, the igniter and red igniter LED will be turned on and the igniter allowed to heat to ignition temperature for a 20-second period. The purge LED is turned off during this period, although the combustion blower continues to run.
4. Gas ignition: When the igniter warm-up period is completed, the gas valve is powered and a six-second Trial for Ignition (TFI) begins. The first two seconds of the TFI is the Ignition Activation Period (IAP).
During IAP, the igniter remains powered. At the end of the two-second IAP, the igniter and the igniter LED are turned off, while the gas valve remains powered. The igniter is now used as a flame rod, to detect the main burner flame.
If the main burner did not light during the IAP, it will now light during the remainder of the TFI. While the burner may light at any time during the TFI, the igniter is enabled as a flame sensor only for the last second or so during that period.
Normal run
If a flame is detected during the trial for ignition, the circulator, inducer and the main burner operate normally to provide heat to the conditioned space.
The thermostat input, pressure switch, limit/aquastat circuit and the main burner flame are continually monitored to assure that the system is operating properly. When the call for heat ends, the main valve and circulator are shut off immediately. The inducer continues to run for a 30-second post-purge and the purge LED will turn on during this period.
Wiring & Circuitry of Connector CN6
We will next discuss a detailed breakdown of circuitry through the nine pin CN6 controller, in conjunction with Combustion Air Blower, Circulator, CN2 (the primary of 24 volt transformer), Igniter and the Gas Control (gas valve).
On a Call for Heat starting at the “W” terminal on the thermostat, it goes to Pin 7 on the CN6 9 Pin connector. Then it goes through the printed circuit board to Pin 4, out of Pin 4 to the Auxiliary Limit, Aquastat and then to Pin 6. Out of Pin 6, the relays lK and 2K are powered, which brings on the Circulator and Combustion Air Blower (15 Second Pre-purge).
Next, it continues from Pin 6 to Pin 3 through the printed circuit board, then out of Pin 3 through the Air Proving Switch, which closes when the Combustion Air Blower is powered.
After that, it goes back into the connector on Pin 1 and comes to two open switches: 4Kl and 3Kl. Powering the relay 5K sends 120 Volts to the Hot Surface Igniter along with a 20-second igniter warm-up. The delay circuit then sends 24 volts to 3K and 4K, which causes relay contacts 3Kl and 4Kl to close, sending 24 volts to Pin 5 and then out of Pin 5 to the Gas Valve, which is now powered.
The circuit then goes to Pin 2 and through the printed circuit board to Pin 8 (which is connected to ground), through the ground to CN2 (the secondary of the transformer), back through the printed circuit board to Pin 9, and finally out of Pin 9 to the “R” terminal on the thermostat. This is a complete series circuit. ICM